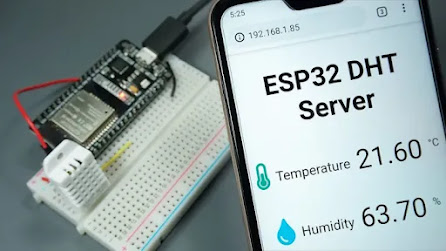
weather monitoring system without (LCD)


features of system as follow particularly:
(4) Sensors :
  •   DHT11 – Temperature and Humidity Sensor

  • BMP180/BMP280 – Barometric Pressure and Altitude Sensor

  • Rain Sensor – To detect rain (Analog or Digital type)

  • Light Sensor -LDR 

  • DHT 11: ADVANTAGES

  • The DHT11 is very cheap compared to many other temperature and humidity sensors can work with Arduino or esp 32. it is to use in  projects or monitoring systems

  • BMP180/BMP280: ADVANTAGES

  • Both BMP180 and BMP280 are  pressure sensors  used for measuring atmospheric pressure and temperature.  the BMP180 is a  sensor with low power use, the BMP280 is its improved is improved from BMP180

  • RAIN SENSOR: ADVANTAGES


  • Rain sensors automatically detect rainfall . and tells that it is raining or not it also use low power and is convenient to use and can help to build project easily 
LIGHT SENSOR (LDR);

  • They have a straightforward working principle and do not need  external power to operate. This makes them
  • High Sensitivity to Light can detect light value easily also contain LDR  that is the crucial part of sensor.

  • material required is ; 
  • DHT11 

  • BMP180/BMP280

  • Rain Sensor 

  • Light Sensor

  • ESP 32


  •  

  • program:

  • #define BLYNK_TEMPLATE_ID "TMPL3MbU20MhJ"
    #define BLYNK_TEMPLATE_NAME "Weather Monitoring System"
    #define BLYNK_AUTH_TOKEN "-c0Q1L6oayv7l535YzG-kOVodVqelbP7"

    #define BLYNK_PRINT Serial
    #include <WiFi.h>
    //#include <ESP8266WiFi.h>
    #include <BlynkSimpleEsp32.h>
    #include <Adafruit_Sensor.h>
    #include <Adafruit_BMP085.h>

    #include <DHT.h>
    Adafruit_BMP085 bmp;
    const int pin = 16;
    const int pin2 = 5;

    int rain = 0;
    float l = 0;
    float r=0;

    char auth[] = BLYNK_AUTH_TOKEN;

    char ssid[] = "WIFI name";  // type your wifi name
    char pass[] = "password";  // type your wifi password

    BlynkTimer timer;


    #define DHTPIN 4 //Connect Out pin to D2 in NODE MCU
     
    #define DHTTYPE DHT11  
    DHT dht(DHTPIN, DHTTYPE);


    void sendSensor()
    {
      float h = dht.readHumidity();
      float t = dht.readTemperature(); // or dht.readTemperature(true) for Fahrenheit
      float l = analogRead(pin);
      float p = bmp.readPressure() / 100.0F;

      float r = analogRead(pin2);


      if (isnan(h) || isnan(t) || isnan(l) || isnan(p) || isnan(r)) {
        Serial.println("Failed to read from sensor!");
        return;
      }
      // You can send any value at any time.
      // Please don't send more that 10 values per second.
       
        Blynk.virtualWrite(V6,p);
        Blynk.virtualWrite(V7,r);
        Blynk.virtualWrite(V0, t);
        Blynk.virtualWrite(V1, h);
        Blynk.virtualWrite(V2, l);
        Serial.print("Temperature : ");
        Serial.print(t);
        Serial.print("    Humidity : ");
        Serial.println(h);
        Serial.print("    Light : ");
        Serial.println(l);
        Serial.print("Pressure : ");
        Serial.print(p);
        Serial.print("    Rainfall : ");
        Serial.println(r);
        delay(3000);
    }
    void setup()
    {  
     
      Serial.begin(115200);
     

      Blynk.begin(auth, ssid, pass);
      dht.begin();
      timer.setInterval(100L, sendSensor);
      pinMode(l, INPUT);
      }
    void Rainsensor() {
      bool value = analogRead(r);
      if (value == 1) {
        WidgetLED LED(V7);
        LED.on();
      } else {
        WidgetLED LED(V7);
        LED.off();
      }
    }
    void LDRsensor() {
      bool value = digitalRead(l);
      if (value == 1) {
        WidgetLED LED(V2);
        LED.on();
      } else {
        WidgetLED LED(V2);
        LED.off();
      }
    }
    void loop()
    {
      Blynk.run();
      timer.run();
      LDRsensor();
      Rainsensor();
     }


Comments

Popular posts from this blog

ESP with DHT 11 part 2

ESP 32 ADVENTURE

ESP 32 TO DHT 11